Hướng dẫn đăng nhập và đăng ký bằng tài khoản Google Gmail trong Laravel 5.8
Trong bài hướng dẫn này, mình muốn chia sẻ với bạn cách đăng nhập bằng tài khoản google bằng Package laravel/socialite trong laravel . chúng ta có thể dễ dàng đăng nhập và đăng ký bằng tài khoản google gmail trong laravel . chúng ta sẽ sử dụng google xác thực để đăng nhập trong laravel.
Nếu bạn muốn tạo đăng nhập bằng tài khoản google thì bạn có thể thực hiện dễ dàng bằng Package laravel/socialite laravel. Nếu bạn sử dụng khung PHP khác thì sẽ khó khăn hơn để đăng nhập bằng google. Nhưng laravel cung cấp Package laravel/socialite để bạn có thể tùy biến nhanh chóng. Bạn chỉ cần tạo id từ ứng dụng Google Api.
Các bước để thực hiện đăng nhập với tài khoản Google Api:
Bước 1: Cài đặt Laravel 5.8
Trong bước này, nếu bạn chưa thiết lập ứng dụng laravel 5.8 thì chúng ta phải tải ứng dụng laravel 5.8 mới. Vì vậy, chạy lệnh dưới đây và nhận được ứng dụng laravel 5,8:
composer create-project --prefer-dist laravel/laravel googleLogin
Bước 2: Cài đặt Socialite
Trong bước tiếp theo, chúng ta sẽ cài đặt Package laravel/socialite để kết nối với tài khoản google. Vì vậy, trước tiên hãy mở terminal của bạn và chạy Composer dưới đây:
composer require laravel/socialite
Sau khi cài đặt Package laravel/socialite, Hãy thêm vào config / app.php dòng sau:
'providers' => [

    ....

    Laravel\Socialite\SocialiteServiceProvider::class,

],

'aliases' => [

    ....

    'Socialite' => Laravel\Socialite\Facades\Socialite::class,

],
Bước 3: Tạo ứng dụng Google Api
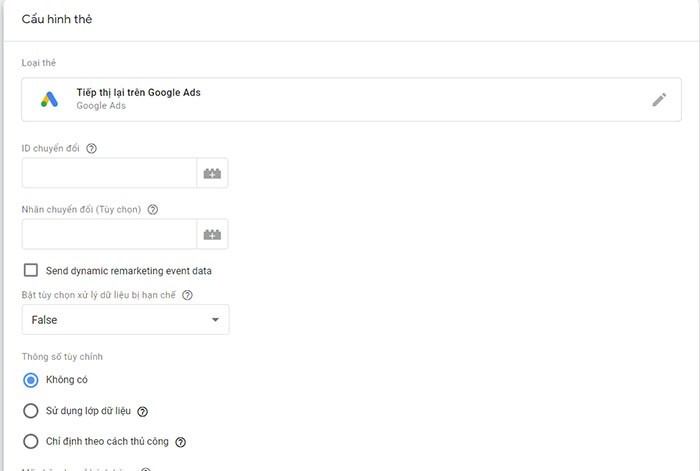
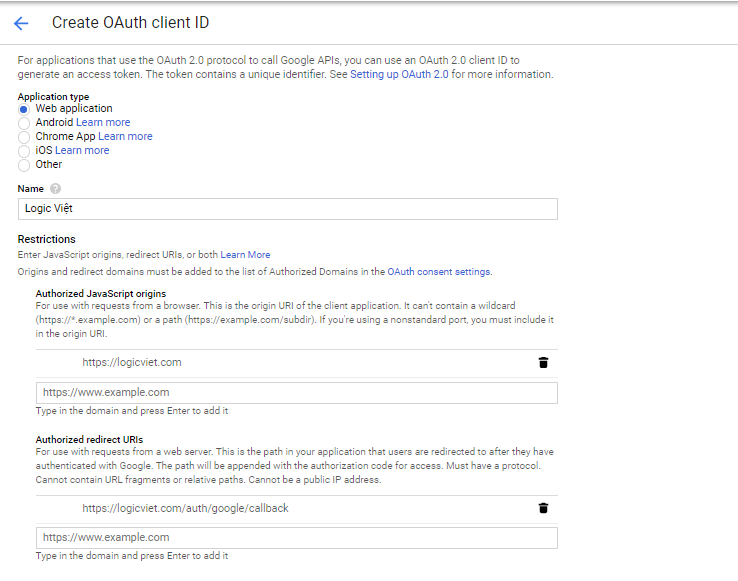
Nếu bạn không có tài khoản ứng dụng Google Api thì bạn có thể tạo từ đây: Google Developers Console. bạn có thể xem hình ảnh minh họa dưới :

Bây giờ bạn phải nhấp vào Credentials và chọn tùy chọn đầu tiên oAuth và nhấp vào nút Create new Client ID:
Sau khi tạo tài khoản, bạn hãy copy App ID. Tiếp theo copy App Id vào trong config / services.php:
config/services.php
return [
    ....
    'google' => [
        'client_id' => 'app id',
        'client_secret' => 'add secret',
        'redirect' => 'http://learnl52.hd/auth/google/callback',
    ],
]
Bước 4: Thêm cột cơ sở dữ liệu
chúng ta cần thêm google_id vào bảng người dùng. Vì vậy, hãy chạy lệnh dưới đây:
php artisan make:migration add_google_id_column
Migration
<?php

use Illuminate\Support\Facades\Schema;
use Illuminate\Database\Schema\Blueprint;
use Illuminate\Database\Migrations\Migration;

class AddGoogleIdColumn extends Migration
{
    /**
     * Run the migrations.
     *
     * @return void
     */
    public function up()
    {
        Schema::table('users', function ($table) {
            $table->string('google_id')->nullable();
        });
    }

    /**
     * Reverse the migrations.
     *
     * @return void
     */
    public function down()
    {
        //
    }
}
app/User.php
<?php

namespace App;

use Illuminate\Notifications\Notifiable;
use Illuminate\Contracts\Auth\MustVerifyEmail;
use Illuminate\Foundation\Auth\User as Authenticatable;

class User extends Authenticatable
{
    use Notifiable;

    /**
     * The attributes that are mass assignable.
     *
     * @var array
     */
    protected $fillable = [
        'name', 'email', 'password', 'google_id'
    ];

    /**
     * The attributes that should be hidden for arrays.
     *
     * @var array
     */
    protected $hidden = [
        'password', 'remember_token',
    ];

    /**
     * The attributes that should be cast to native types.
     *
     * @var array
     */
    protected $casts = [
        'email_verified_at' => 'datetime',
    ];
}
Bước 5: Tạo Routes
Thêm dòng này vào routes.php
app/Http/routes.php
Route::get('google', function () {
    return view('googleAuth');
});

Route::get('auth/google', 'Auth\LoginController@redirectToGoogle');
Route::get('auth/google/callback', 'Auth\LoginController@handleGoogleCallback');
Bước 6: Thêm vào controller
chúng ta cần thêm phương thức google auth vào tệp LoginControll.php
app/Http/Controllers/Auth/LoginController.php
<?php

namespace App\Http\Controllers\Auth;

use App\Http\Controllers\Controller;
use Illuminate\Foundation\Auth\AuthenticatesUsers;
use Socialite;
use Auth;
use Exception;
use App\User;

class LoginController extends Controller
{
    /*
    |--------------------------------------------------------------------------
    | Login Controller
    |--------------------------------------------------------------------------
    |
    | This controller handles authenticating users for the application and
    | redirecting them to your home screen. The controller uses a trait
    | to conveniently provide its functionality to your applications.
    |
    */

    use AuthenticatesUsers;

    /**
     * Where to redirect users after login.
     *
     * @var string
     */
    protected $redirectTo = '/home';

    /**
     * Create a new controller instance.
     *
     * @return void
     */
    public function __construct()
    {
        $this->middleware('guest')->except('logout');
    }

    public function redirectToGoogle()
    {
        return Socialite::driver('google')->redirect();
    }

    public function handleGoogleCallback()
    {
        try {

            $user = Socialite::driver('google')->user();

            $finduser = User::where('google_id', $user->id)->first();

            if($finduser){

                Auth::login($finduser);

                return return redirect('/home');

            }else{
                $newUser = User::create([
                    'name' => $user->name,
                    'email' => $user->email,
                    'google_id'=> $user->id
                ]);

                Auth::login($newUser);

                return redirect()->back();
            }

        } catch (Exception $e) {
            return redirect('auth/google');
        }
    }
}
Bước 7: Tạo tập tin Blade
resources/views/googleAuth.blade.php
<!DOCTYPE html>
<html>
<head>
    <title>Laravel 5.8 Login with Google Account Example</title>
</head>
<body>
    <div class="container">
       <div class="row">
         <div class="col-md-12 row-block">
          <a href="{{ url('auth/google') }}" class="btn btn-lg btn-primary btn-block">
          <strong>Login With Google</strong>
          </a>
         </div>
       </div>
    </div>
</body>
</html>
Chúc các bạn thực hiện thành công!
0 Comments
no comments!

![Hướng dẫn tạo website bằng Theme Wordpress từ Bootstrap 4 [2019] - Phần 4](https://logicviet.com/images/posts/6193569.PNG)
![Hướng dẫn tạo website bằng Theme Wordpress từ Bootstrap 4 [2019] - Phần 1](https://logicviet.com/images/posts/50286915.PNG)
![Hướng dẫn tạo website bằng Theme Wordpress từ Bootstrap 4 [2019] - Phần 8](https://logicviet.com/images/posts/63914764.PNG)
![Hướng dẫn tạo website bằng Theme Wordpress từ Bootstrap 4 [2019] - Phần 3](https://logicviet.com/images/posts/42289365.PNG)
