Hướng dẫn tạo website bằng Theme Wordpress từ Bootstrap 4 [2019] - Phần 8
Ở phần 8 này này mình hướng dẫn về comment, cách tạo comment và bình luận trong wordpress và author ( liệt kê các bài viết thuộc tác giả ).
Comments.php
Tạo file comments.php, đây là giao diện phần bình luận dưới bài viết.
- wp-content/themes/logicviet/comments.php
<?php
    $comments_arg = array(
        'form'  => array(
            'class' => 'form-horizontal'
            ),
        'fields' => apply_filters( 'comment_form_default_fields',
                array(
                    'author' => '<div class="form-group">'.
                                    '<label for="author">' . __( 'Họ và tên' ) . '</label> ' .
                                    '<input id="author" name="author" class="form-control" type="text"  size="30" />
                                </div>',

                    'email' => '<div class="form-group">'.
                                    '<label for="email">' . __( 'Email' ) . '</label> ' .
                                    '<input type="email" id="email" name="email" class="form-control" type="text" size="30" />
                                </div>',

                    'url'   => '<div class="form-group">'.
                                    '<label for="url">' . __( 'URL' ) . '</label> ' .
                                    '<input type="url" id="url" name="url" class="form-control" type="text" size="30" />
                                </div>' )
                ),
                'comment_field'         => '<div class="form-group">' .
                                                '<label for="comment">' . __( 'Bình luận' ) . '</label><span>*</span>' .
                                                '<textarea id="comment" class="form-control" name="comment" rows="3" aria-required="true"></textarea>' .
                                            '</div>',
                'comment_notes_after'   => '',
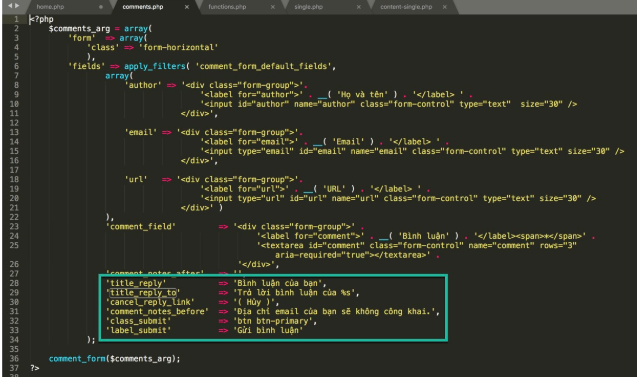
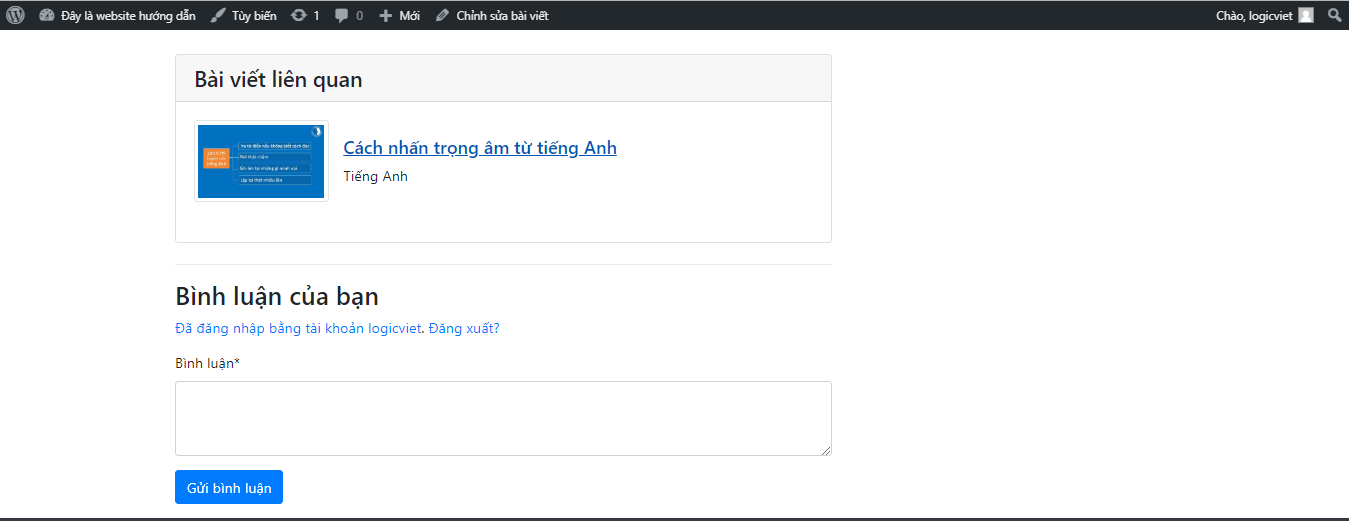
                'title_reply'           => 'Bình luận của bạn',
                'title_reply_to'        => 'Trả lời bình luận của %s',
                'cancel_reply_link'     => '( Hủy )',
                'comment_notes_before'  => 'Địa chỉ email của bạn sẽ không công khai.',
                'class_submit'          => 'btn btn-primary',
                'label_submit'          => 'Gửi bình luận'
            );

    comment_form($comments_arg);
?>

<?php if ( have_comments() ) : ?>
    <div class="card my-4">
        <h5 class="card-header"><?php comments_number() ?></h5>
        <div class="card-body">
            <?php wp_list_comments(['callback' => 'logic_viet_comment']) ?>
        </div>
</div>
<?php endif; ?>
Sử dụng hàm comment_form để gọi khung bình luận. Hàm wp_list_comments để liệt kê các bình luận.
1 Comments
Tin Tin
2 năm trước
Hay quá

![Hướng dẫn tạo website bằng Theme Wordpress từ Bootstrap 4 [2019] - Phần 10](https://logicviet.com/images/posts/59413897.PNG)
![Hướng dẫn tạo website bằng Theme Wordpress từ Bootstrap 4 [2019] - Phần 6](https://logicviet.com/images/posts/29024537.PNG)
![Hướng dẫn tạo website bằng Theme Wordpress từ Bootstrap 4 [2019] - Phần 1](https://logicviet.com/images/posts/50286915.PNG)
